When it comes to food, I can't live without this little bulb called garlic. It is not only coming in with a wide range of health benefits, but it is also very easy to store and even easier to cook with. Now here comes the fun part. You can easily grow it yourself provided you have the conditions in your garden that garlic needs. We find that home grown garlic has a much better taste and stores a lot longer than store bought one. It might not be as huge, but we don't need as much as we would of the store bought version.
So here it is, my quick guide on how to grow and harvest garlic in your back yard.
Choosing your variety
There are many different types of garlic, for the best result get some from a local nursery befitting to your climate. We gave our farmer friend a call and looked up different varieties online before we went to the grocery store and bought ours. If you are so lucky that your local store gives you a variety on the package that might be a good idea. Make sure to soak the bulbs individually if they are store bought as commercial growers usually coat their garlic in an anti sprouting agent which will make sure that you do not have a good harvest at all.
Growing conditions
You will need a very sunny spot with well dug, light and free draining soil. The bulbs will need the warmth to grow and ripen. Make sure that you do not plant the garlic into soil that has been recently manured as the bulbs tend to rot in that.
When to grow
Garlic cloves can be planted out either autumn (northern hemisphere) or spring (southern hemisphere). I plant mine usually in the autumn which is somewhere between October and December here (southern England). The garlic is ready to harvest between June and August the following year. This means that it will take up space in your garden when you usually can't grow much except for the hardiest of vegetables. The rule of thumb is that you harvest your garlic on the longest day of the year, and we did this year with great success. The garlic needs to be exposed to cold conditions to split into several cloves. Hence you plant it before winter hits.
How to plant garlic
Before I plant my garlic, I like to break the bulbs apart into separate cloves. Remember to not peel the individual cloves. Place them bottom down into a shallow bowl, lined with a damp kitchen cloth. I leave them in there for a few days until they get roots. This helps them grow when the conditions are not as ideal as they should be. Our garden doesn't have a perfectly sunny spot for them during winter when the sun is low, so I like to give them this kick start.

When ready plant the cloves into rows about 20cm apart. In each row plant the cloves about 10 cm apart. Gently push each clove into the soil about 3 cm deep. I let the pointy ends of the garlic peek out slightly.
Maintenance
Garlic needs very little attention. Make sure to keep removing weeds and check the bulbs the first few days. Feathery visitors or curious pets might uproot the garlic bulbs in the first weeks while the soil is soft.
Harvesting
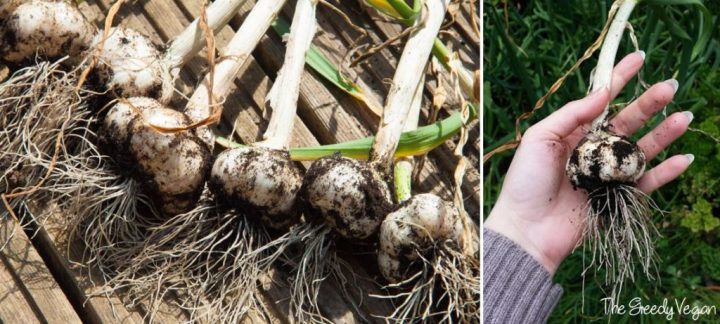
Your garlic will be ready to harvest when the leaves begin to turn yellow. If you live in drier areas, you can leave the garlic in until the leaves died down entirely. Here we have to harvest it much earlier as we tend to have a lot of rain showers in the summer. Lift the garlic carefully by loosening the soil around the bulbs.
Dry the bulbs by spreading them on a wire mesh or tray. After they're dry, which can take anywhere from a few days to a week, you can plait them into their typical braided form or store them in burlap bags or garlic pots.

And if you are really lucky you have neighbours who lend you their poodle for quality control. Bradley inspected every single bulb just to make sure everything was in order.


Leave a Reply