• Skip to primary navigation
  • Skip to main content
  • Skip to primary sidebar
  • Skip to footer

The Greedy Vegan

Indulge in delicious, vegan food!

  • Home
  • Recipes
    • Breakfast
      • Bread & Buns
      • Bread Spreads
      • Breakfast Smoothies
      • Energy Bars & Balls
      • Muffins & Sweet Bread
      • Oats
    • Main Dishes
      • Pasta Dishes
      • Pizza
      • Rice Dishes
      • Casserole, Pies & Tartes
      • Crepes, Sandwiches & Wraps
      • Soups & Stews
      • Pancakes & Waffles
    • Sides & Appetizers
      • Vegetables
      • Salads
      • Soups
      • Bread & Buns
      • Rice & Grain
    • Desserts & Sweets
      • Frozen Desserts
      • Mousse & Puddings
      • Pancakes & Waffles
      • Cakes, Pies & Tarts
      • Cookies & Cupcakes
      • No-Bake Cakes & Bars
    • Beverages
      • Smoothies
      • Juices & Lemonades
      • Mocktails
      • Tea & Coffee
      • Vegan Milk
    • Condiments
      • Dips & Sauces
      • Hummus
      • Pastes & Pestos
      • Pickled & Fermented
      • Oils & Vinegars
      • Seasonings
  • Home & Garden
    • Kitchen How-To’s
    • Garden How-To’s
    • DIY’s
  • Shop
    • Kitchen Must-Haves
    • Pantry Essentials
    • Photography
  • About
    • About The Greedy Vegan
    • Features
    • Working with The Greedy Vegan
    • FAQ
    • Disclaimer
    • Privacy Policy
You are here: Home / Home & Garden / Garden How-To's / Expanding a Vegetable Patch

Expanding a Vegetable Patch

February 21, 2015 By Gloria 2 Comments

Pin6
Reddit
Yum
Share
Share
Share1
Tweet
Email
WhatsApp
7 Shares
Please note that this post contains affiliate links of products that I love and use. This rewards me with a small commission if you choose to buy through the links and none of this will cost you anything – but it does help me pay the bills and deliver you quality content. – Love, Gloria.

Although this post is about expanding a vegetable patch you might as well want to read it if you want to build one. The steps are literally the same. I’ll show you in a few simple steps how to get from lawn to vegetable patch. All you need is a rake, a shovel, soil, some borders and time.

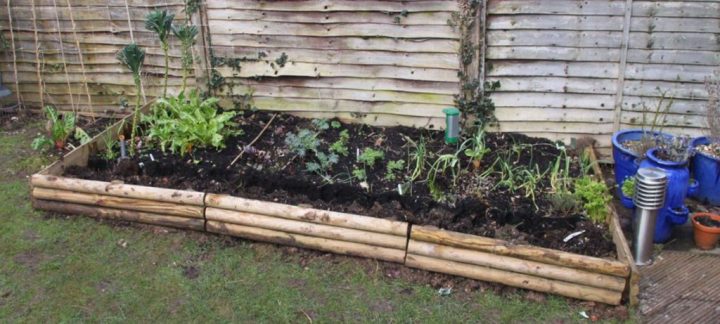
When you are thinking about trying your first vegetable patch, start out with a smaller patch and expand when you feel like it. I started with a smaller one in our backyard since I had just moved in and were not sure about how much we wanted to grow. Either way, it is smart to start out smaller and expand as you go. As you see on the picture below our small vegetable patch provided plenty of produce already. However we wanted to expand it to try to grow more and different vegetables.

Plan the vegetable patch

When planning a new vegetable patch you might want to look for a place that is sunny and has good soil. If it is too shadowy the vegetables won’t grow that well. The quality of soil can be improved, lack of sun can’t be fixed. Once you found a good spot map it out with either sticks or the borders.

Prepare the vegetable patch

It helps to remove as much grass as possible. Do so by raking the grass vigorously and remove as much grass as possible by doing so. After doing that you need to turn over the soil using a shovel, the deeper you dig the better. When you are done with this put the borders in place. You can use anything from stones, bricks and metal to wood. I like using natural materials in my garden so this is what I chose. Now it is time to fill the vegetable patch with soil. If you have a compost bin you can use your own soil like we did. You can also buy good all purpose compost at the local gardening centre and scatter it over the freshly turned soil. 

veg patch expansion 001

Get planting

Now, this is the truly fun part. Chose what you want to plant in your vegetable garden. If you are a beginner try herbs, leeks, strawberries and any leafy green like kale, chard or lettuce. For more advice on how to replant or plant vegetables click here.

veg patch expansion 002

Related

Pin6
Reddit
Yum
Share
Share
Share1
Tweet
Email
WhatsApp
7 Shares

Filed Under: Garden How-To's, Home & Garden Tagged With: gardening, grow your own, vegetables

Previous Post: « Cashew Cream Cake With Raspberries
Next Post: Planning a Vegetable Patch »

Reader Interactions

Comments

  1. Matt says

    July 20, 2015 at 7:20 am

    I love those before and after pictures. You seem to be able to grow so much in such a tiny garden! So impressive.

    Reply
    • Gloria says

      July 22, 2015 at 11:23 am

      I am working on an update this very moment. Actually two to be precise. One about the flowers and one about the vegetables.

      Reply

Leave a Reply Cancel reply

This site uses Akismet to reduce spam. Learn how your comment data is processed.

Primary Sidebar


Popular Posts

Watermelon Lemonade Without Added SugarWatermelon Lemonade Without Added Sugar
How to Freeze AvocadosHow to Freeze Avocados
Perfect Crispy Sweet Potato FriesPerfect Crispy Sweet Potato Fries
Carrot Soup with Ginger and TurmericCarrot Soup with Ginger and Turmeric
Grilled Zucchini Ribbons with Sriracha MarinadeGrilled Zucchini Ribbons with Sriracha Marinade
How to Pick ElderberriesHow to Pick Elderberries
Peanut Butter and Jelly SmoothiePeanut Butter and Jelly Smoothie
How to Grow Succulents From SeedHow to Grow Succulents From Seed

Also on the Blog

Creamy Risotto with Broccoli Spears

Blackberry Sorbet with Blood Orange

Ruby Red Grape Ice Pops With Whole Fruits

Roasted Baby Potatoes with Brussel Sprouts

Footer

Connect

Welcome to The Greedy Vegan! This is a vegan food blog with a focus on delicious recipes made with fresh, seasonal ingredients. I try to use as much local and in season produce as possible while at the same time proving that vegan cooking is exciting. Read More…

More from the Blog

As seen on


Copyright © 2023 The Greedy Vegan™